Welcome to the world of social networking, where people can connect, share and interact with others across the globe. Social networking platforms have revolutionized the way we communicate, share information and connect with people around us.
If you are based in Nigeria and want to start your own social network platform, you have come to the right place. In this article, we will guide you through the process of creating your own social network platform in Nigeria, from idea generation to launch.
Whether you are an entrepreneur, a tech enthusiast or simply looking to make a difference, we will provide you with the essential tools and resources to turn your dream into reality. So, let’s dive in and explore how to start your own social network platform in Nigeria.
What is a social network platform?

A social network platform is a web-based application or a mobile app that allows users to create a personal profile, connect with other users, share content such as messages, photos, videos, and engage in various types of interactions such as likes, comments, and shares.
Social network platforms typically have features such as newsfeeds, messaging systems, and search functions that enable users to find and connect with friends, family, and people with similar interests.
Examples of popular social network platforms include Facebook, Twitter, Instagram, LinkedIn, and many others. These platforms have become an integral part of modern communication, enabling people from all over the world to connect and communicate with each other in real-time.
Things You’ll need to start your own social media platform.
Here a a list of things you’ll be needing in other to start your own Social Network Platform in Nigeria right away.
- Web Hosting; Web hosting is like renting a space on the internet where you can store your website files. These files include everything that makes up your website, like pictures, text, and videos. When people want to visit your website, they type in your website address (URL) into their web browser, and their computer connects to the server where your website is hosted to access those files.
- Domain Name; domain name is like a “street address” for your website on the internet. It is the name that people type into their web browser’s address bar to visit your website e.g www.naijawebhost.com. It makes it easy for people to find and remember your website without having to remember its IP address, which is a long series of numbers that computers use to identify websites.
- WoWonder – The Ultimate PHP Social Network Platform Script; “WoWonder” is a PHP Social Network Script, WoWonder is the best way to start your own social network website without having to code it from scratch.
So, in this post i’m going to walk you through the whole process of getting your hosting plan, purchasing a domain name, getting the WoWonder script, installing it on the server and configuring it from start to finish.
How to get a Hosting Plan for your Social Network Platform in Nigeria

To purchase a hosting plan, CLICK HERE. or click on the image above and you’ll be redirected to the web hosting page.
Once there its now time for us to choose a hosting package for our script, you can always start with the least expensive plan and upgrade your hosting plan later however I’ll suggest you start with the basic hosting plan.

So to purchase a hosting plan just click on ORDER NOW, and it will redirect you to the next page wher you’ll choose your billing cycle add domain name register and make payment so next lets select our billing cycle.
I’d always advise going with at least a 12-month plan, but if it’s beyond your budget you can always start with a one month or 3 months hosting plan.

By default, 12 months is selected for us, so I’ll leave it just the way it is and then register a domain name.
How to register a domain name for your Social Network Platform in Nigeria
Now that we’ve selected our hosting plan its now time to add a domain name to it.
Coming up with a good or perfect domain name idea can be hard, that’s why we’ve built a free tool to help you generate great domain name ideas for free. click here or click on the image below to learn how to generate great domain ideas.

Now that you’ve got your perfect domain name idea it’s time to register it. i did a search for the domain name cochat.com.ng and its available and what’s more? I’m getting this domain name for free with a one-year hosting plan.
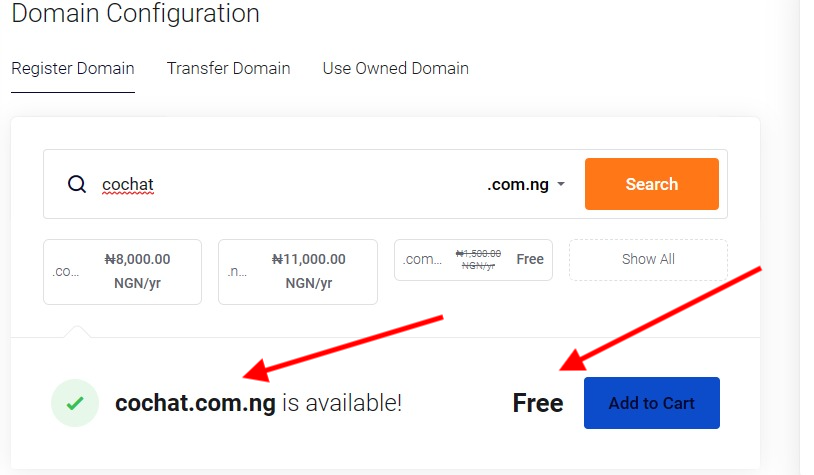
You can also choose other popular domain name extensions like .com, .net, .org etc.
Next just click on “add to cart”, scroll down fill in your information to create an account and click on “Checkout” to complete your payment.
Once you’re done with the payment, you’ll receive an email containing your hosting account login details. use the details to login to your cPanel area. Learn How to login to your CPanel here.
How to get the WoWonder social network platform script
To purchase the script visit the script page from codecanyon WoWonder – The Ultimate PHP Social Network Platform by DoughouzForest (codecanyon.net)
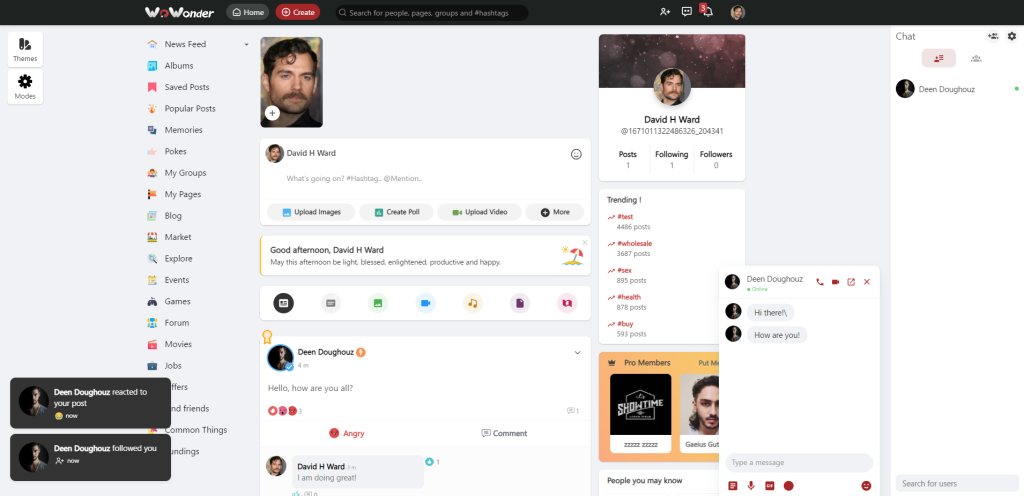
Now that we’ve got both our Hosting plan and domain name it’s now time to purchase our social network platform script and install it on our server’s web hosting control panel.
How to Install WoWonder in cPanel – naijawebhost
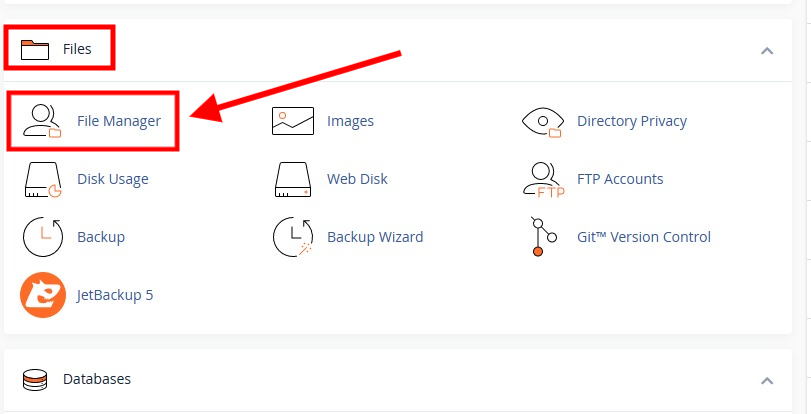
First login to CPanel and goto the files section of your cPanel area, click on file manager and locate the public_html folder.
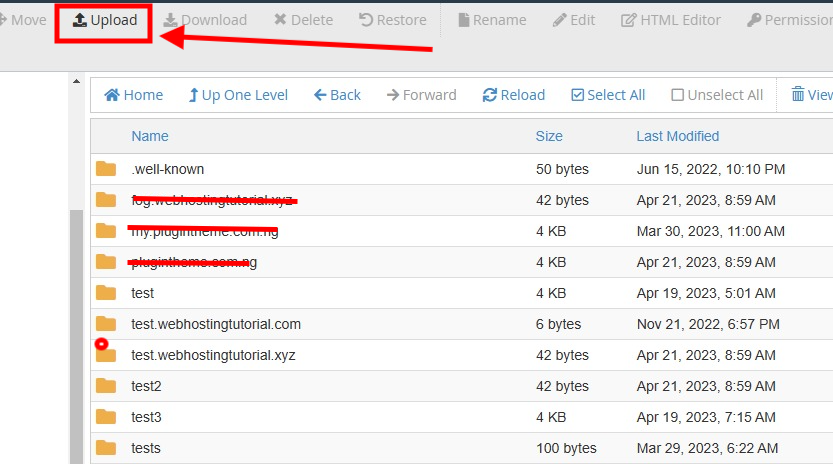
Once we’re in our public_html folder, next thing we need to do is to upload our scripts files which we got from codecanyon in zip format.
Click on upload and select the file and wait for the upload to finish
Once we’re done uploading our script, the next thing we’ll do is to extract it. to do that just right click on it if you’re using a PC or click an hold if you’re on mobile, select extract and allow it to finish extracting.
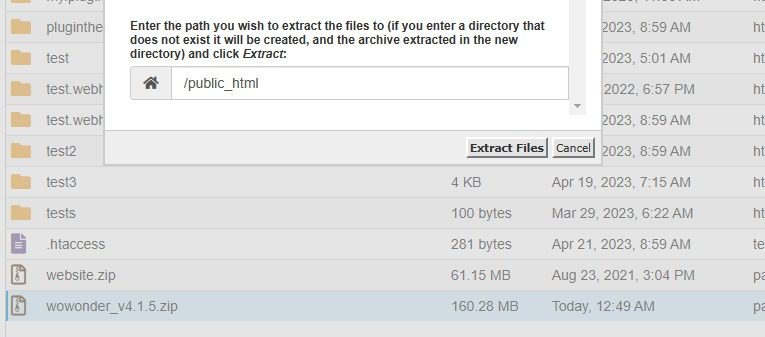
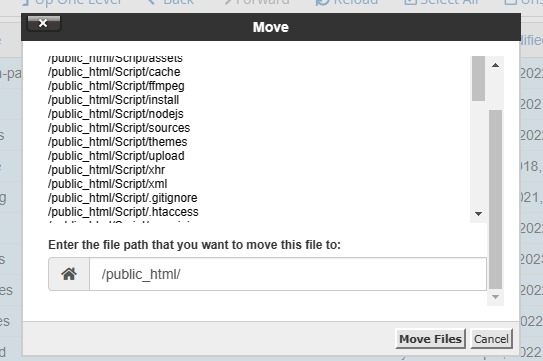
Now before anything else we need to make sure that our script files are located in the right folder by default after extracting the files it will be located in a sub-folder with the name script. we need to move these files to our main directory if not our script will install on ourdomain.com/script instead of ourdomain.com.
To do this just mark everything in the script folder and move it to the main public_html folder.
Next open your browser (Google Chrome, Edge, Opera etc).
Go to http://www.YOUTSITE.com/install
Agree the Terms of Use then click Next.
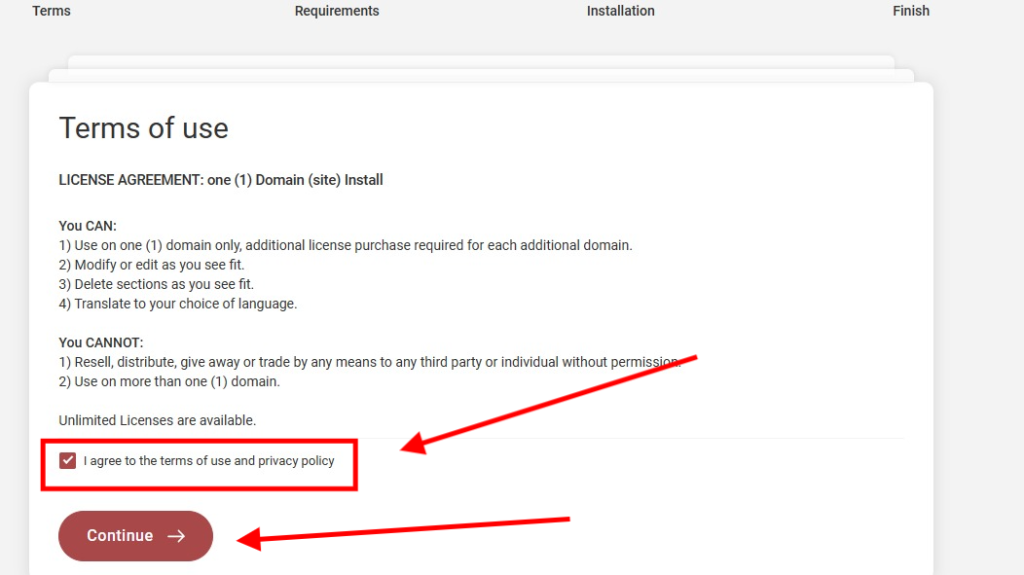
Next it will take you to the requirements stage, naijawebhost is fully compatible with the WoWonder script and we’ve already installed the required PHP extentions, so just click on next.
On the next page you’ll need to fill the required information like purchase code, QSL database information etc.
How to create SQL database for Your WoWonder Script
Goto cPanel and scroll down to the database section click on “MySql Database wizard”.
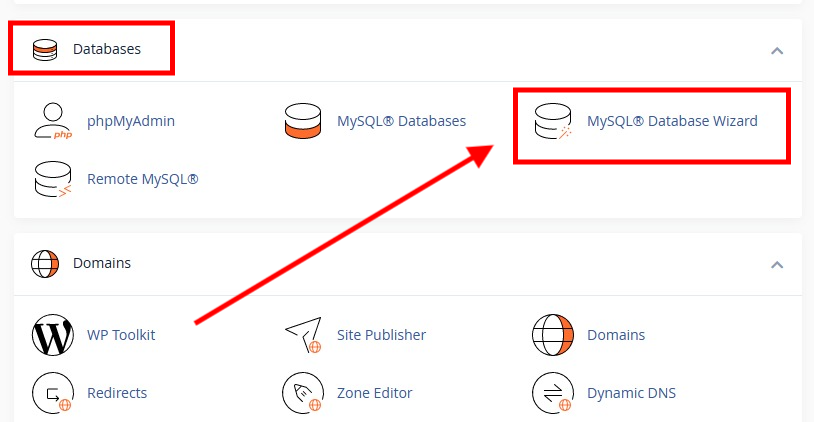
First create a database; Select a database name and click on next

Next create a database user and password for your new database and click on next
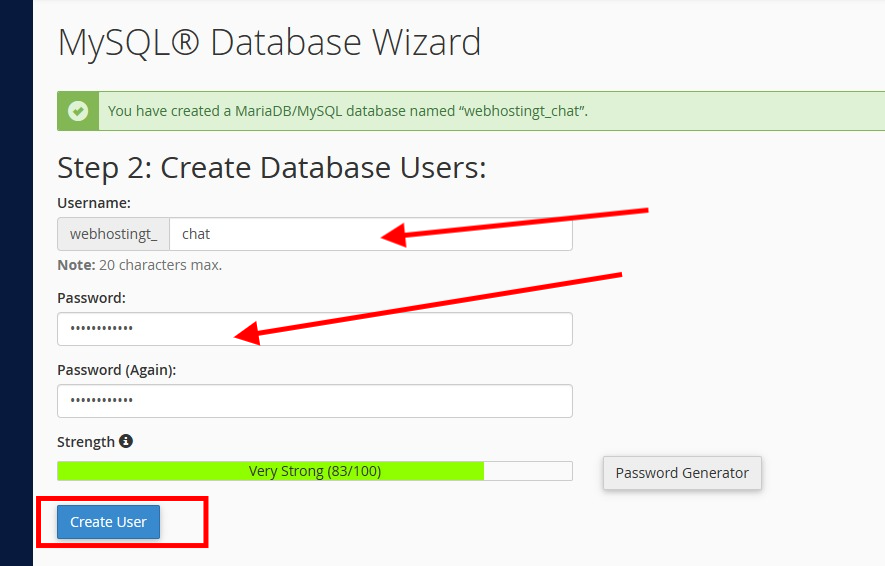
Next you need to assign PRIVILEGES for the new database user, select “ALL PRIVILEGES” and click next step. Congratulations you’ve created your database. Now we need to link it to our new social platform script to complete the installation.
You’ll need to insert your purchase code in the first box and in the area of SQL host enter “localhost” then fill in your database name, database user and password.
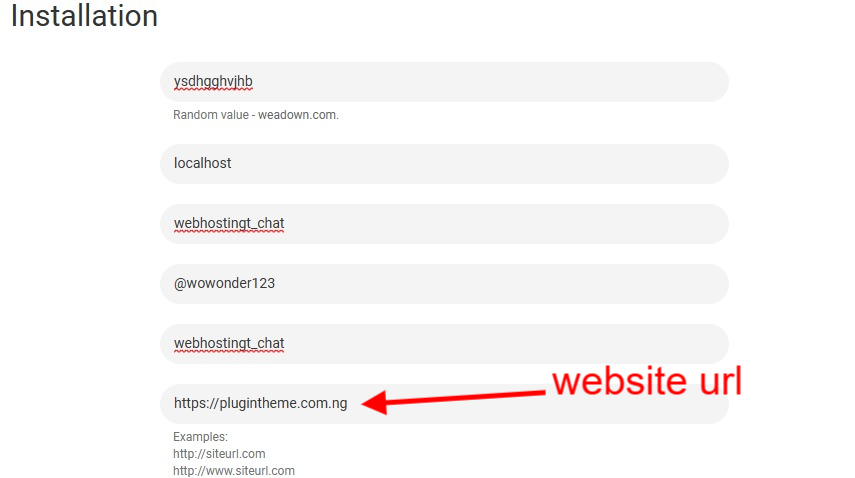
Next scroll down and fill in your admin details like email password and username then click on install and waif for the installation to finish.


